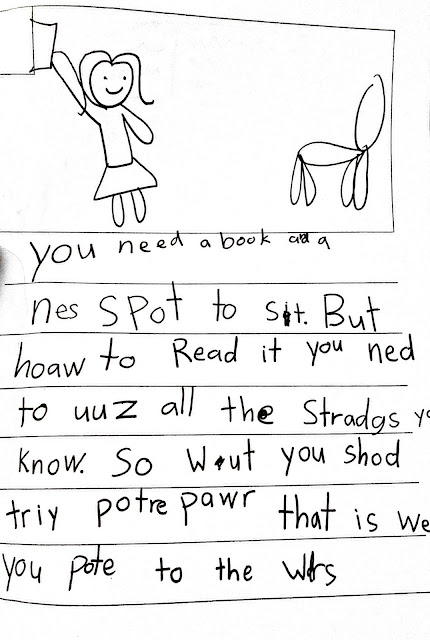
Ten Tips to Make Your How To Teaching the Best it Can Be!
I am wrapping up a writing unit focusing on How To writing, and I want to share with you some things that went great and somethings I might change -if I could teach the unit all over again.
Although I am using the kindergarten unit from the Teacher College units of study, I am adjusting the lessons to lift the level of their writing so their writing looks and feels like first-grade How To’s.
So, when I look at the samples in the kindergarten unit, I have to think... How can I make my kids teaching books even better?
 |
TIP#1: One Volume Matters
One thing I have learned from my years of attending amazing TC workshops is that our students have to write lots and lots and lots of books in a week. VOLUME MATTERS! Because of the volume of writing matters, my students only use black markers to write and sketch(Paper Mate Flair Felt Pens). When I first started teaching, if you told me I would take markers away at workshop time, I wouldn’t believe it! I got into many disagreements with colleagues about letting kids use markers. After attending many TC workshops and conversations with close colleagues, I realized that I needed to make the marker switch. At writing workshop time, I want my students to spend their time writing, not coloring. If my kids need to color, I’ll provide an opportunity to color at another time of the day. We use black markers to write, and green markers to revise and edit. The only time we take out colored markers is when we pick a book to publish, and we spend a day coloring. It's easy to get kids in the habit of revising and editing with a different color. Now, I know when students are going back to their work.
Tip #2: Tap and Tell
Another thing my students need is a lot of time to orally rehearse, especially the students who struggle with the structure of the genre. Since this is a HOW to genre the structures will be an introduction, steps that teach, and an ending. This is something that I have to remind myself… kids need to tell their book over and over and over again. Every time they tell it, it can be an opportunity to make it better, or it can be an opportunity for a child to remember how their book can go.
TIP#3 Shared Writing
Doing shared writing helps students be better writers.
The teacher and students write a HOW to before you begin the unit. I would select a topic that the class has experienced together. I had my class write about the fire drill. When you do shared writing, the teacher does all the writing, the students help “tell” the parts. The piece should not be perfect, you want to be able to go back and revise parts. Below you “see the parts” that we added to our text because we changed the color. Kids need this when they struggle with saying more with language or in their writing, generating ideas, immersing kids in the language of a new genre.
Shared Writing:
- The kids are talking while the teacher is writing.
- The teacher does all of the writing.
- The teacher will write in more sophisticated ways.
- The teacher should make it sound fancier.
- Kids should keep rereading the text (repeat a few times).
- The teacher can model REVISING the text (green marker)
Tip: Some kids will write their book using the same topic as the class shared writing book... I think that is okay this child might need an extra scaffold.
TIP#4 Copy the book
Provide a copy of the shared writing for students to read. I like to write my text on 11X18 but you can shrink this down to regular paper size.
Tip #5 Structure Scaffold
When I was teaching the HOW to unit, I had three students who really struggled with the structure of writing a teaching book. They wrote a couple of books that sounded like storybooks and not teaching texts. I gave the three students HOW to book with the pictures all ready glued onto the pages (example below). The book was HOW to Clean your Desk. During the small group, we turn and touched each page, we practiced together... “How might our introduction go?” The students then wrote the words to match the pictures. This helped the students understand the structure of the genre.
Tip:
Pick a How-To topic that your students know a lot about.
How to unpack in the morning.
How to get ready for the reading workshop.
How to play a favorite math game.
How to get ready for the bus.
How to make a book.
How to play UNO.
TIP #6 Make HOW to Videos (kids have access now to I Pads)
I would start the unit with kids making videos or the teacher scaffolding video making. Before I even have them pick up a pen!
Making How-To video forces kids to really be able to do the steps. If you are forced to “act it out” it makes it really clear whether or not your teaching book makes sense. During the writing unit, my students were doing a great job with adding tips and warnings but some kids did not have all the teaching steps. Also, it was difficult “acting out” how to’s in a classroom where all students are wearing a mask and maintaining 6 feet!
What I mean by scaffolding a video would be…
At recess yesterday, a group of kids are playing tag. The teacher pulls the group together (six feet apart) and says we are going to make a video to teach others how to play tag… who wants to help me? Of course, the kids will be BEYOND excited to take part in video making!!!
• One child can say the introduction… Hey, do you want a fun game to play at recess? (this is the teacher scaffold… tell the kids what to say if they don’t know what to say )...This How-To will teach you how to play tag.
• You will need a NOODLE (to tag kids) and kids to play
• Step One…. the person who is “IT” counts to ten.
• All the other kids run away….
• The tagger runs around the playground to “NOODLE TAG” a person
• TIP… watch where you are going or TIP don’t hit too hard
Tip #7 the TEACHER makes a video
Kids LOVE to see their teacher taking part in the work.
If you want students' buy-in… I think this is a MUST! I made three videos for the kickoff to make a How-to video.
My first one, I made of myself was of me making a peanut butter and jelly sandwich, my second one I made was of me teaching the kids how to play hide-and-go-seek with my dog (which I really play).
I revised my video and made one of them even better! My first dog video had an okay introduction, and it was too short. My second dog video had a few props and gave a comparison in the introduction. I also gave more examples. Kids learn that we revise in writing, and we can revise in video making too!
The kids in my class LOVE the HOW-TO videos on Epic Books
 |
| My class is obsessed! |
My friend Dayna gave me the suggestion of using Flipgrid to have students upload and share their How-To videos (optional of course). I was a little hesitant to add another piece of technology, but I have to say it was the best tool I have used so far this year. It was simple to create accounts for each student and the kids love using it.
Also, the best part is that they can comment on one another’s video. One little girl has made two AMAZING videos. For one thing, it’s refreshing to see a student talk without their mask on. Using videos as a tool to express oneself allows different students to shine. It’s also a great way for kids to connect with one another. So, this week on our one remote day, students will be required to create a home HOW to. I plan to have students brainstorm a list of possible topics
Here are some videos my kids made
• playing chess
• building with Legos
• getting snarls out of your hair
• making a peanut butter sandwich
• making your bed
• drawing people
Tip #8
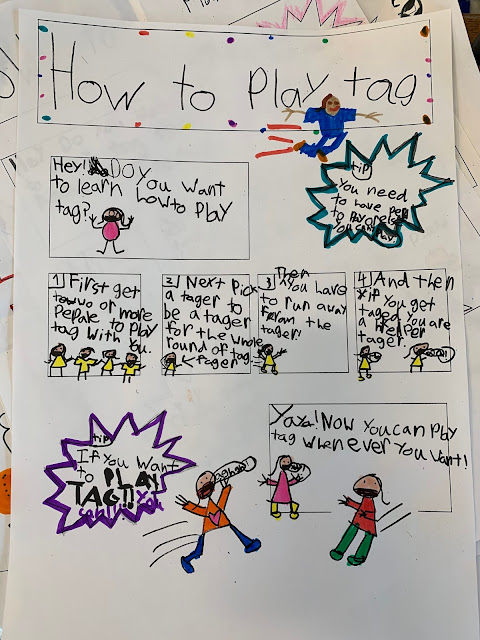
Let kids make HOW to posters. We looked at an example, and kids were able to come up with their own thought. Click here for How to Poster templates.
Tip # 9
Create a micro-progression to show students the expectations. The goal should be to get to the next star. It is powerful to build progressions with students.
Tip #10
Teach HOW-TO snap words. This is the perfect time to teach these snap words to your students. Have a few places in the classroom where students can find them as a resource.
Enjoy your student books. I love to take out their books from the start of the unit and marvel at how much they have grown as a writer! If you have any How- TO tips share them in the comments!
Happy December!
Melissa


